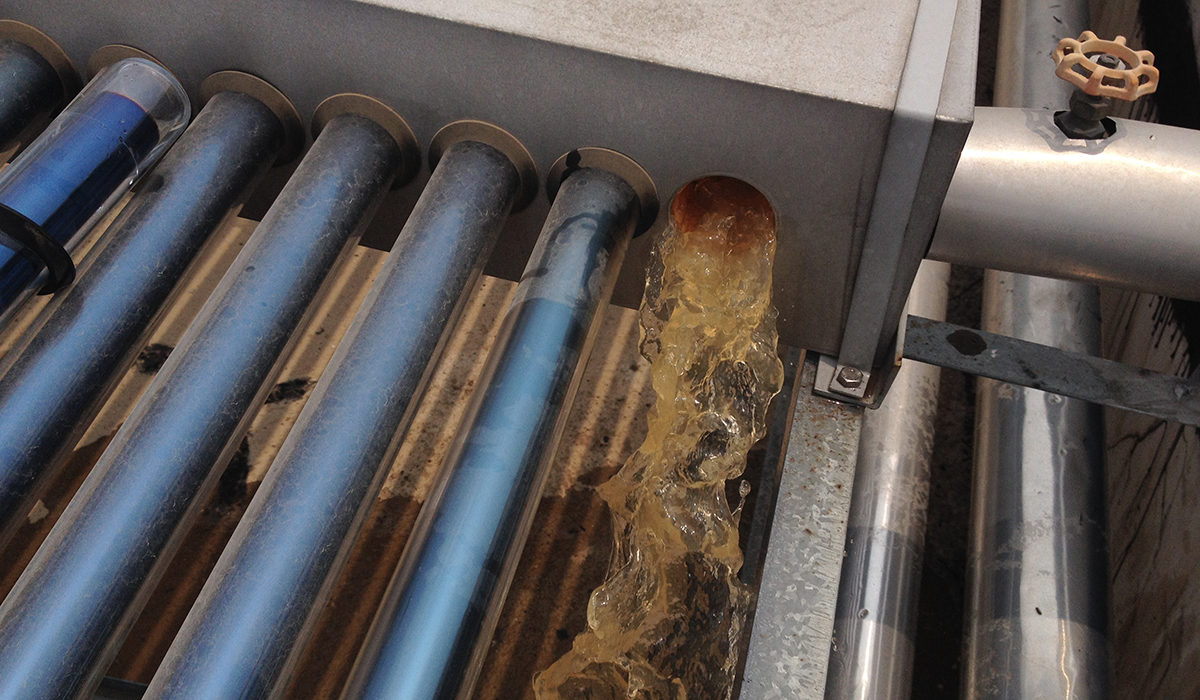
Leakage at the Vacuum Tube Insertion Point
Cause: The vacuum tube sealing ring may not be properly installed, damaged after multiple uses, or the placement area of the sealing ring may be dirty with debris.
Repair Method:
a. Gently rotate the vacuum tube to see if the issue can be resolved.
b. If not, the vacuum tube must be removed. It is best to have two people cooperate: one holds the top of the vacuum tube, and the other holds the bottom. Pour some water at the vacuum tube insertion point to facilitate removal. Rotate back and forth in the same direction, insert a small part first, then detach the bottom support, and slowly rotate the vacuum tube out.
c. Check if the silicone ring is damaged or has cuts. Replace it if necessary. Also, check if there is debris in the placement area of the sealing ring, clean it thoroughly before inserting the vacuum tube again. If the silicone ring hole does not have an inverted edge process, wrap 1-2 layers of Teflon tape around the gap to prevent cutting the ring.
Leakage Due to Poor Sealing of External Component Connections
Cause: The sealing components may be damaged or improperly installed.
Repair Method: Repair according to the handling methods for plumbing components.
Water Tank Collapse Due to Blocked Ventilation Port
Cause: The user has blocked the intake and exhaust ports, causing the solar water tank to be evacuated.
Repair Method: Replace the water tank.

Inaccurate or No Display
Cause: The sensor may be damaged or the wiring connection may be poor.
Repair Method: Check the sensor and wiring, and replace or repair them if necessary.
Display Shows Garbage Codes or Flashes
Cause: The control board may be faulty.
Repair Method: Replace the control board.
Electric Heating Does Not Work
Cause: The electric heating tube may be damaged or there may be wiring issues.
Repair Method: Check the electric heating tube and wiring, and replace or repair them if necessary.
Insufficient Electric Heating Power
Cause: The electric heating tube may be aged or fouled.
Repair Method: Replace the electric heating tube or clean the water tank.
Unable to Fill Water
Cause: May be due to insufficient water pressure, closed valves, or clogged pipes.
Repair Method: Check the water pressure, valves, and pipes, and adjust or clean them if necessary.
Continues to Fill After Reaching Full Capacity
Cause: May be due to a faulty water level sensor or abnormal control board.
Repair Method: Check the water level sensor and control board, and replace or repair them if necessary.
Water Temperature Not High Enough
Cause: May be due to fouling on the surface of the heat-collecting tube, insufficient lighting area, or poor water quality.
Repair Method: Clean the heat-collecting tube, increase the lighting area, or improve water quality.
Low Heating Efficiency
Cause: May be due to damaged insulation or improper installation location.
Repair Method: Repair or replace the insulation layer, and adjust the installation location.
Leakage at Joints
Cause: May be due to loose joints or damaged sealing parts.
Repair Method: Tighten the joints or replace the sealing parts.
Pipeline Leakage
Cause: May be due to cracked pipes or loose connections.
Repair Method: Replace the pipes or tighten the connections.
Loud Noise in Solar Water Heater
Cause: May be due to pump failure or restricted water flow.
Repair Method: Check the pump and water flow, and replace or clean them if necessary.
Electric Leakage in Solar Water Heater
Cause: May be due to faulty electrical wiring or poor grounding.
Repair Method: Check the electrical wiring and grounding, and repair or replace them if necessary.
The above are the common faults and repair methods for solar water heaters. I hope they are helpful to you. When repairing a solar water heater, please pay attention to safety to avoid accidents. If you cannot solve the problem yourself, please have a professional perform the repairs.